카테고리 없음2025. 2. 14. 14:29

# Install Elasticsearch with Debian Package


root@KIMG-ADLOG-02:~# wget -qO - https://artifacts.elastic.co/GPG-KEY-elasticsearch | gpg --dearmor -o /usr/share/keyrings/elasticsearch-keyring.gpg
^C
gpg: signal Interrupt caught ... exiting


# 다운로드 실패로 Proxy 설정


root@KIMG-ADLOG-02:~# vi /root/.bashrc
root@KIMG-ADLOG-02:~# cat /root/.bashrc  | grep export
export http_proxy=10.7.4.237:3128
export https_proxy=10.7.4.237:3128


# 수정파일 적용
root@KIMG-ADLOG-02:~# source /root/.bashrc


# Install Elasticsearch with Debian Package
root@KIMG-ADLOG-02:~# wget -qO - https://artifacts.elastic.co/GPG-KEY-elasticsearch | gpg --dearmor -o /usr/share/keyrings/elasticsearch-keyring.gpg
File '/usr/share/keyrings/elasticsearch-keyring.gpg' exists. Overwrite? (y/N) y
root@KIMG-ADLOG-02:~#


# Installing from the APT repository

KIMG-ADLOG-02:/$
KIMG-ADLOG-02:/$ apt-get install apt-transport-https
Reading package lists... Done
Building dependency tree... Done
Reading state information... Done
The following NEW packages will be installed:
  apt-transport-https
0 upgraded, 1 newly installed, 0 to remove and 17 not upgraded.
Need to get 3,974 B of archives.
After this operation, 35.8 kB of additional disk space will be used.
Get:1 http://mirror.kakao.com/ubuntu noble/universe amd64 apt-transport-https all 2.7.14build2 [3,974 B]
Fetched 3,974 B in 0s (220 kB/s)
Selecting previously unselected package apt-transport-https.
(Reading database ... 121764 files and directories currently installed.)
Preparing to unpack .../apt-transport-https_2.7.14build2_all.deb ...
Unpacking apt-transport-https (2.7.14build2) ...
Setting up apt-transport-https (2.7.14build2) ...
Scanning processes...
Scanning linux images...

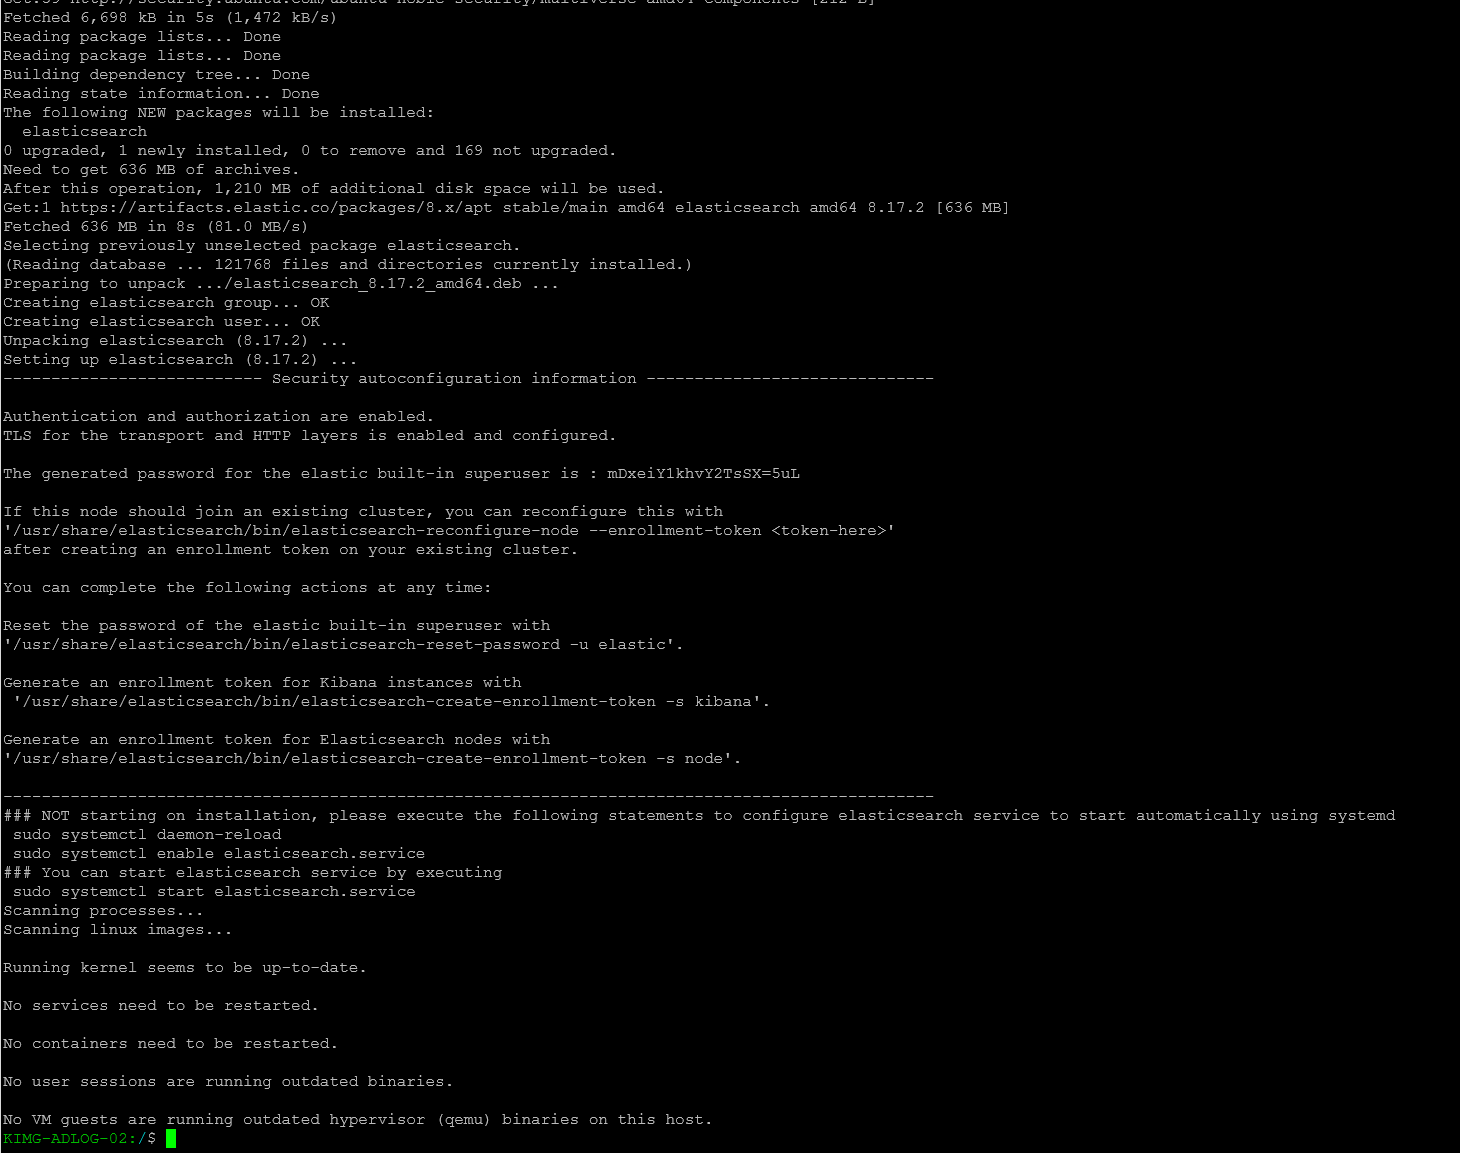
Running kernel seems to be up-to-date.

No services need to be restarted.

No containers need to be restarted.

No user sessions are running outdated binaries.

No VM guests are running outdated hypervisor (qemu) binaries on this host.
KIMG-ADLOG-02:/$


KIMG-ADLOG-02:/$ echo "deb [signed-by=/usr/share/keyrings/elasticsearch-keyring.gpg] https://artifacts.elastic.co/packages/8.x/apt stable main" |  tee /etc/apt/sources.list.d/elastic-8.x.list
deb [signed-by=/usr/share/keyrings/elasticsearch-keyring.gpg] https://artifacts.elastic.co/packages/8.x/apt stable main
KIMG-ADLOG-02:/$


KIMG-ADLOG-02:/$ apt-get update && apt-get install elasticsearch


The generated password for the elastic built-in superuser is : mDxeiY1khvY2TsSX=5uL


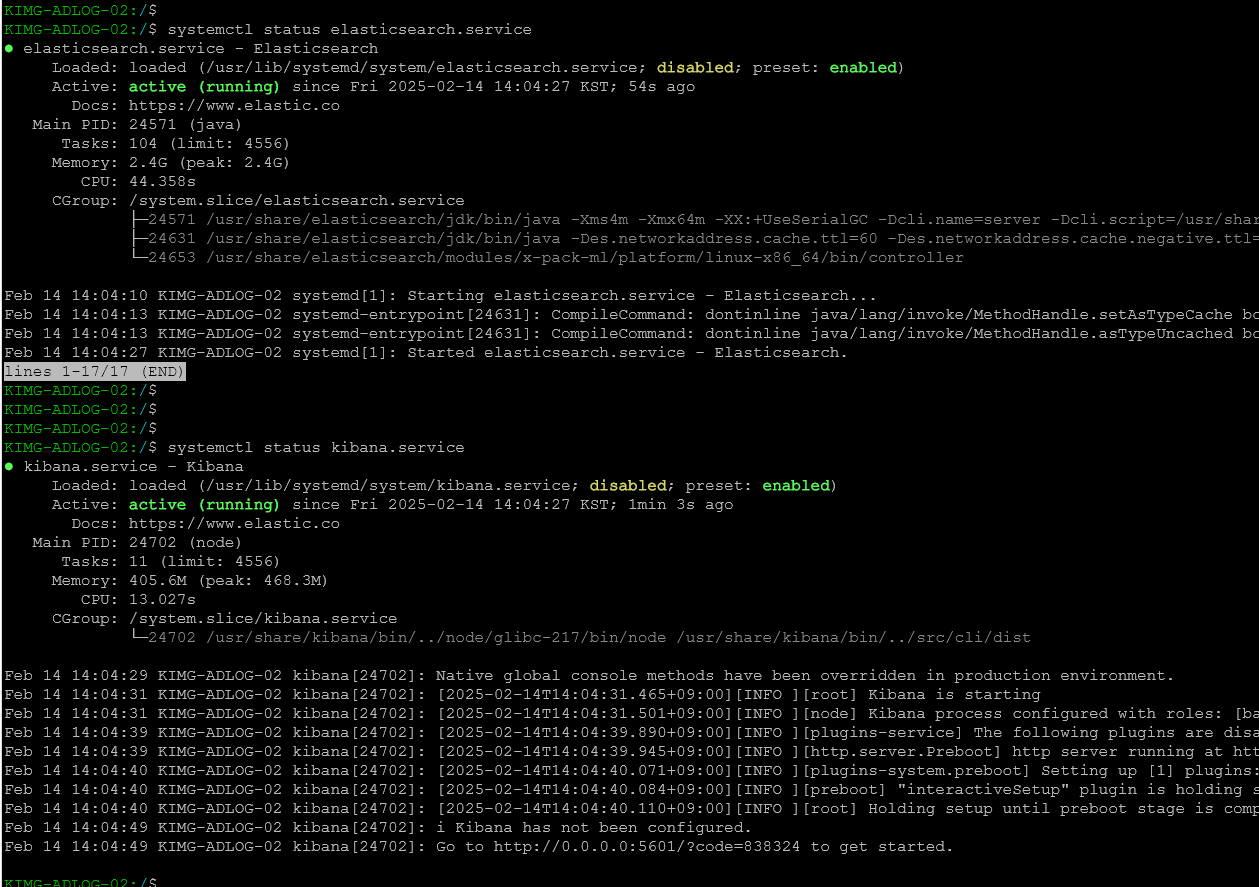
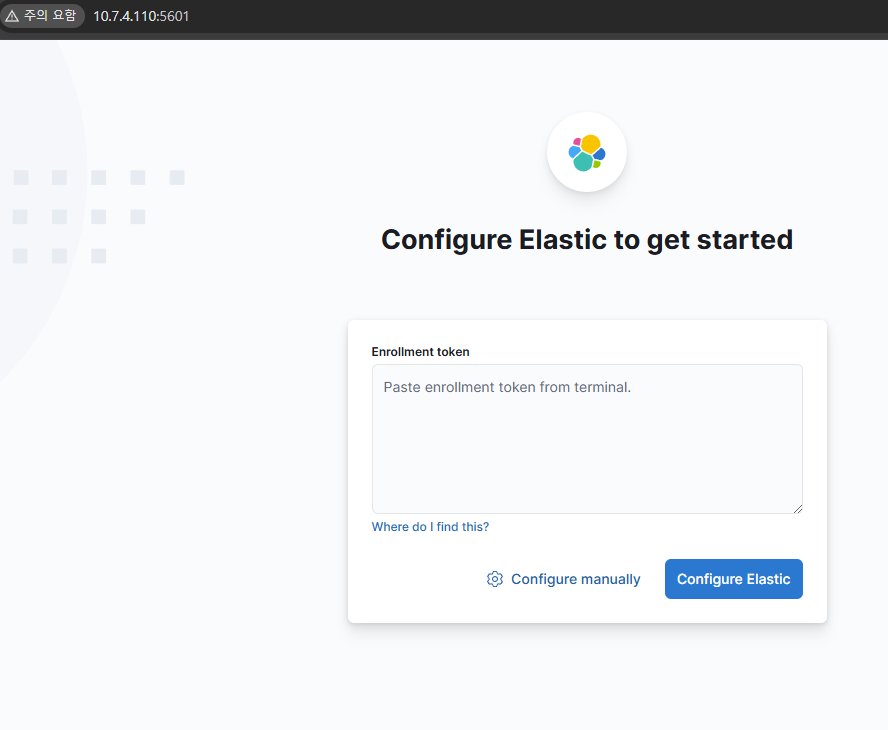
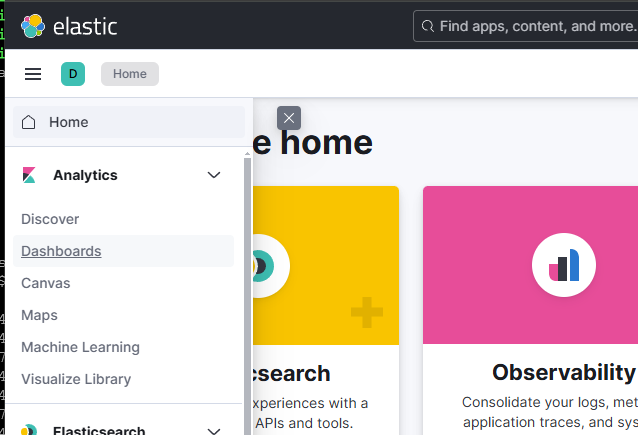
KIMG-ADLOG-02:/$ apt-get install kibana


KIMG-ADLOG-02:/$ ufw allow from 0.0.0.0/0 to any proto tcp port 5601 comment kibana
Rule added
KIMG-ADLOG-02:/$ ufw allow from 0.0.0.0/0 to any proto tcp port 9200 comment elasticsearch
Rule added


KIMG-ADLOG-02:/$ vi /etc/kibana/kibana.yml

# 변경전 localhost


# 변경후 0.0.0.0 


KIMG-ADLOG-02:/$ systemctl start elasticsearch.service

KIMG-ADLOG-02:/$ systemctl start kibana.service


KIMG-ADLOG-02:/$ systemctl status elasticsearch.service

KIMG-ADLOG-02:/$ systemctl status kibana.service


통신가능한 브라우저에서 kibana 포트로 접


# 토큰 발행

KIMG-ADLOG-02:/$ cd /usr/share/elasticsearch/bin/

KIMG-ADLOG-02:/usr/share/elasticsearch/bin$ ./elasticsearch-create-enrollment-token -s kibana


# 발행한 토큰 kibana에 등록


# Key 입력


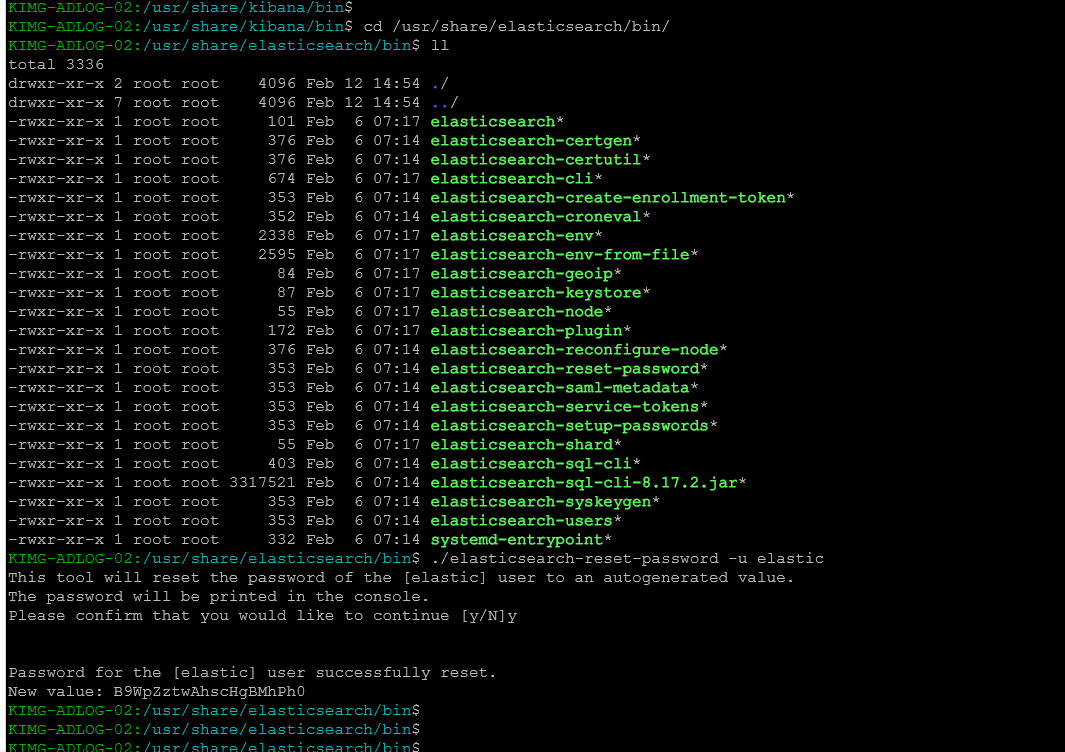
# elaistsearch 설치 후 안내 되는 최초 PW 를 이용하거나. 다음 명령어 통해 패스워드 리셋 후 접속


계정명 : elastic

패스워드 : XXXXXXXXXXX


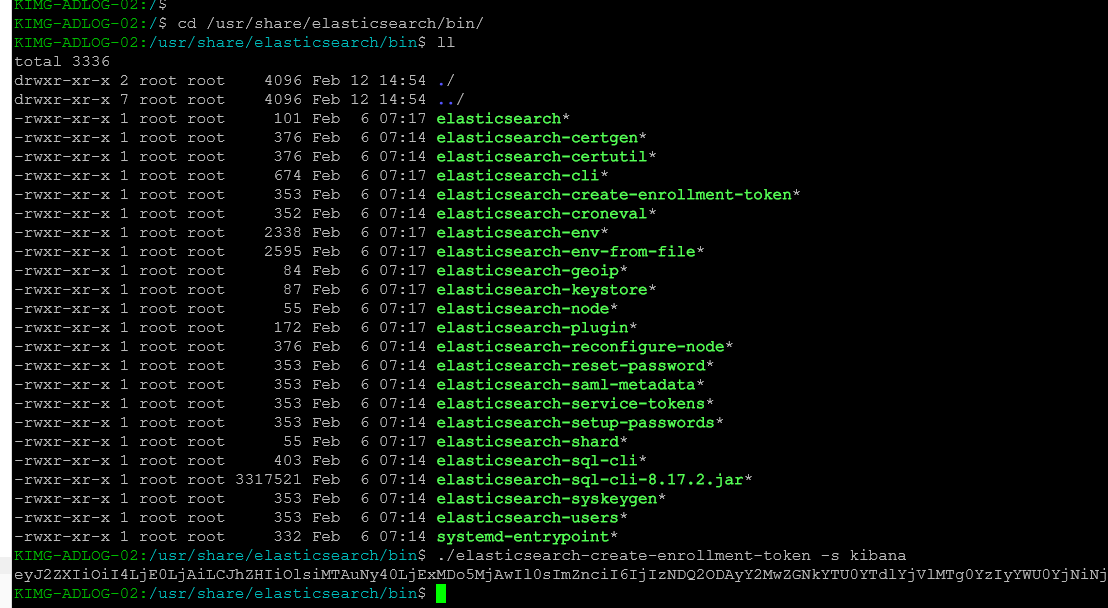
KIMG-ADLOG-02:/usr/share/kibana/bin$ cd /usr/share/elasticsearch/bin/

KIMG-ADLOG-02:/usr/share/elasticsearch/bin$ ./elasticsearch-reset-password -u elastic
This tool will reset the password of the [elastic] user to an autogenerated value.
The password will be printed in the console.
Please confirm that you would like to continue [y/N]y


Password for the [elastic] user successfully reset.
New value: B9WpZztwAhscHgBMhPh0
KIMG-ADLOG-02:/usr/share/elasticsearch/bin$


# Log in


# check - Explore on my own


# 로그인 후 화면


# 후속 작업 

# 대시보드 작업 은 Winlogbeat 설치 이후 예정


Posted by 배움나눔
2020. 2. 3. 17:11

보호되어 있는 글입니다.
내용을 보시려면 비밀번호를 입력하세요.

카테고리 없음2019. 7. 12. 17:22

iptables stop, iptables start and iptables reload fail


modpobe cpu 100%


방화벽(iptables)을 중지, 시작, 재시작시 실패 하고 modprobe 프로세스가 cpu 100% 증상일때

다음과 같이 iptables 실행 파일에서 modprobe -r 줄을 찾아 주석 처리 하고 재시작하면 정상화 된다


Centos6


Vi /etc/init.d/iptables

# 설치 제거 모듈의 줄을 찾으십시오. / modprobe -r

# 사용 #이 줄 또는이 단락을 주석으로 처리하십시오.


Centos7, Debian, Ubuntu

# 특정 환경 설치가 동일하지 않을 수도 있습니다.

즉, iptables 실행 스크립트를 찾아서 수정하십시오.

vi /usr/libexec/iptables/iptables.init

# 설치 제거 모듈의 줄을 찾으십시오.

/ modprobe -r

# 사용 #이 줄 또는이 단락을 주석으로 처리하십시오.

Posted by 배움나눔